AICC: First time install for a 3rd Party LMS
This walk-through intends to provide an overview of the courseware installation process for customers implementing Skillsoft courseware for use with a non-Skillsoft Learning Management System.
It is not intended to serve as a specific installation guide for a particular LMS, but rather to describe the basic process of installation and the Skillsoft recommended configurations for an AICC integration.
 |
Please Note!: If you are processing any Skillsoft Business Impact/Challenge courses, they will need to be processed separately from all other content. The reason for this is because this type of content requires specific completion criteria settings, in order to function properly within your LMS. These courses can be identified by the following course code formats: _pc_ch_xxxxxx or _pc_bi_xxxxxx |
Step 1 - Getting Started
1. Obtain a copy of the Skillsoft Content Installer Kit and extract the contents to your local hard drive.
2. Copy the SkilllSoft course zip file(s) into the "courses" folder of the Content Installer Kit (CIK).
Example: C:\CIK_RELEASE_20151223\Courses\PROJ0513.zip

 |
Note!: If you do not have a copy of the Content Installer Kit, please contact your Skillsoft Learning Consultant/Application Engineer to request a copy for use. |
Step 2 - Using the Content Installer Kit
1. Double Click on the INSTALLER.EXE program. This will start the Courseware Installation program.
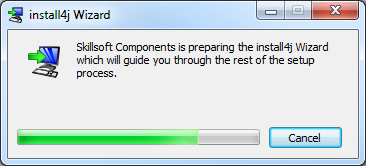
2. On the first screen click Next.

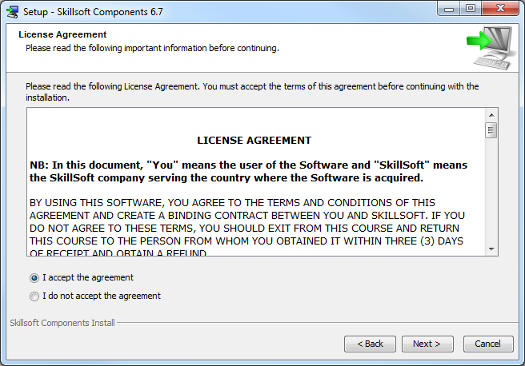
3. Accept the License Agreement on the next screen and then click Next.
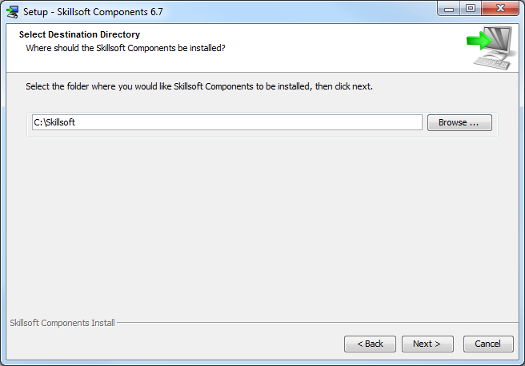
4. Enter the physical path where you want to install the content. Skillsoft recommends using the default of C:\Skillsoft.
To select a different physical path, either type it in the space provided or use the Browse button.
5. On the Installation Type screen select Custom Installation, and then click Next.

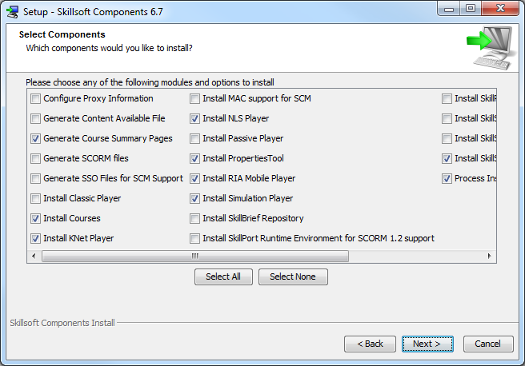
6. The option selection screen is now displayed with a set of defaults selected. Click Select None and then select the options listed below:
|
|
|
Click Next to continue.
7. The list of courses contained within the "courses" folder will now be displayed for you to choose which to install. By default all of the courses will be selected. You can see in this example there are 4 courses available for install.
If you don't wish to install a particular course, remove the checkmark from the Install? column for that course.
Ensure Install course video components is checked.
Click Next to continue.

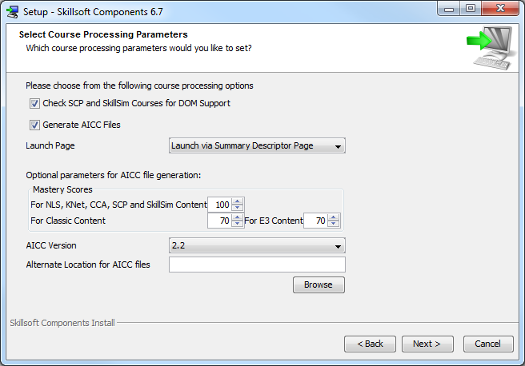
8. The next screen prompts you for details about generating the AICC integration files required for loading the Skillsoft content into your LMS.
The "Mastery Score" and "AICC Version" sections are only used to populate the data elements in the actual AICC metadata files; such as the courseid.au file. If you're simply using the launch pages of our content (either "courseidA1.htm" or "courseidB.htm") and not the standard AICC files (.au, .crs, .cst, .des and .ort), you will not need to modify these fields.
Click Next to continue.
9. On the next screen you will choose which language version(s) of the Course Player to install.
Click Next to continue.

10. On the next screen you can enable or disable support for Skillsoft content download capability. Unless you have been explicitly told by Skillsoft to enable this function, uncheck the check box.
Place a check for Enable signed applet, as this will help alleviate any cross-domain communication difficulties when using the Java-based SCP Player.
Remove the check for Always use SCP for Desktop launch. This will enable a quick logic check during course launch, and will help determine if the Java-free (RIA) or Java-based (SCP) player is used. The logic will always try to launch the course using the Java-free (RIA) player first (if the user is leveraging an HTML5 compatible web browser), otherwise the course will be launched using the Java-based (SCP) player.
Place a check for Generate A Pages, as this option creates the initial launch page for the course.
Install Index Page - this is optional and has no bearing on functionality of the course. It simply creates an html index page of the courses you're installing. The file is placed in the root of the Web folder created by the install process.
Click Next to continue.

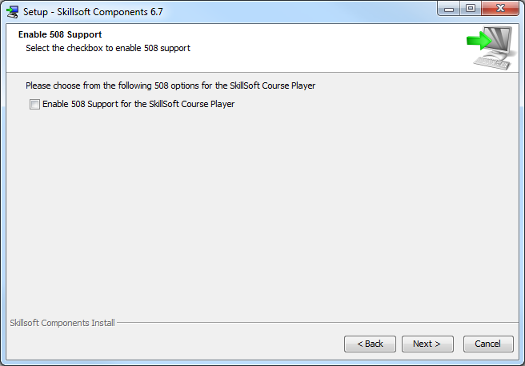
11. On the next screen choose whether to enable the configuration files for Section 508 Support. Section 508 allows users with disabilities to make use of tools such as the Jaws screen reader with Skillsoft courseware.
Skillsoft typically recommends that this option is not checked unless 508 Support is required.
Click Next to continue.
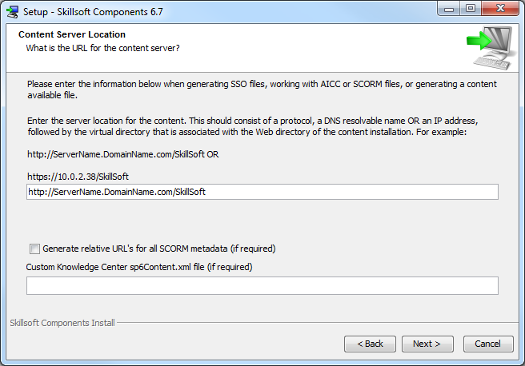
12. On the next screen you will be prompted to enter the server name or IP Address and the virtual directory name you have created for the content server, if required.
The "Server Name" field is only used to populate the course launch string in the actual AICC metadata files; such as the courseid.au file. If you're simply using the launch pages of our content directly (either "courseidA1.htm" or "courseidB.htm") and not the standard five AICC files (.au, .crs, .cst, .des and .ort) you will not need to modify this field.
Skillsoft recommends using a Fully Qualified Domain Name (e.g. http://www.mydomainname.com) and a virtual directory name of Skillsoft.
 |
Note!: At this point in time, you will likely have not already created the virtual directory on your web server. Instructions on doing this for Microsoft Internet Information Server can be found here: http://support.microsoft.com/kb/172138 |
Click Next to continue.
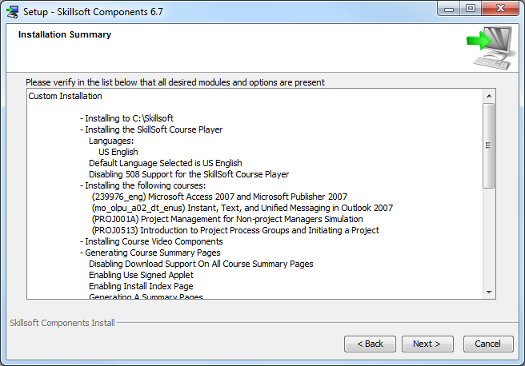
13. You are now presented with a screen to confirm your installation choices.
Click Next to confirm your choices and start the installation.
14. At this point, the installer will start to process the actual courses and generate the AICC metadata and course folder structure.
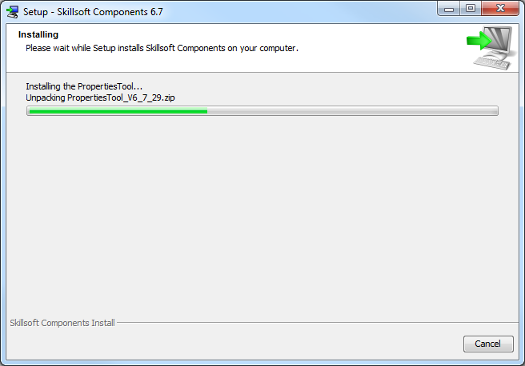
15. During the course of the install, a new window called the Skillsoft Properties Tool will open. This tool is used to change the configuration files for the various course players used by Skillsoft content.
Do not make any changes in this window, as we will configure the course players after the installation has completed.
The following guide can be used for this purpose: Configure Course Players

16. Upon completion you will be presented with the following screen. You may click Finish to close the installer

Step 3 - Configuring the course players
Before you can launch the content from your LMS, you will need to configure the course players. This will ensure that proper communication takes place between your LMS and our course players.
The following guide can be used for this purpose: Configure Course Players
Step 4 - Locating the course launch page
There are a few ways to locate the initial launch page for Skillsoft content. You can either use the actual AICC metadata files (.au, .crs, .cst, .des and .ort), or you can use the direct html launch page using either the "courseidA1.htm" or "courseidB.htm" file.
The courseidA1.htm produces a course summary page and contains hyperlinks to launch the course in a new window. Whereas, the courseidB.htm file launches directly into the course.
| Course Type | AICC Metadata Location |
| Business Skills and SkillSim | C:\Skillsoft\Web\Content\player\<courseid>\aicc |
| Common Course Architecture (CCA) | C:\Skillsoft\Web\Content\cca\<courseid>\aicc |
| e3 / Test Preps | C:\Skillsoft\Web\cbtlib\<courseid>\metadata\eng |
| NLS | C:\Skillsoft\Web\NG\Content\NLS_Content\<courseid>\AICC_TPLMS |
| Theater | C:\Skillsoft\Web\NG\Content\KNet_Content\<courseid>\AICC_TPLMS |
| Element K | C:\SkillSoft\Web\scorm\<courseid> |
| Course Type | Direct Launch Page Location |
| Business Skills and SkillSim | C:\Skillsoft\Web\Content\<courseid>A1.htm |
| Common Course Architecture (CCA) | C:\Skillsoft\Web\Content\<courseid>A1.htm |
| e3 / Test Preps | C:\Skillsoft\Web\cbtlib\<courseid>\metadata\eng\<courseid>.htm |
| NLS | C:\Skillsoft\Web\NG\Content\<courseid>A1.htm |
| Theater | C:\Skillsoft\Web\NG\Content\<courseid>A1.htm |
| Element K | C:\Skillsoft\Web\scorm\<courseid>\xxxxstart_HACP.html |
Support
Should you require any further assistance, feel free to contact us via email at support@skillsoft.com, or call us at your convenience, 24 hours a day, 7 days a week!
For a complete listing of our international phone numbers, please visit http://onlinesupport.skillsoft.com.
Back to the top of this page.
