
The purpose of this walk-through is to provide the ability to see how the soap envelope is properly formatted, and also as a proof of concept to run simple web service calls.
Required items:
- SoapUI - Free Open Source
- Skillport WSDL Endpoint - Provided by a Skillsoft Application Engineer (AE).
 |
Important!: If you are working from a PC within your office environment, it may be advisable to have your local IT/Helpdesk personnel validate that the SoapUI software meets acceptable standards prior to installation. Though the SoapUI software is required in order to make use of this walk-through, it was created by a third party vendor. Skillsoft can assume no responsibility for any complications that might arise as a result of the installation of this software. |
The step-by-step instructions below will show you how to properly configure the SoapUI application to be used in conjunction with the OLSA Web Service Toolkit.
This walk-through assumes that the SoapUI software is already installed, and the contents of the OLSA Web Service Toolkit have been extracted to your local hard drive.
Step 1 - Configure soapUI and the OLSA Toolkit.
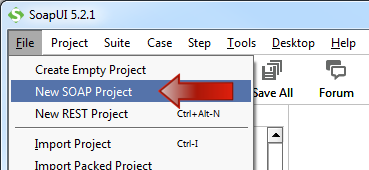
1. Open the soapUI application from your Programs Menu. Once open, select File >> New SOAP Project.
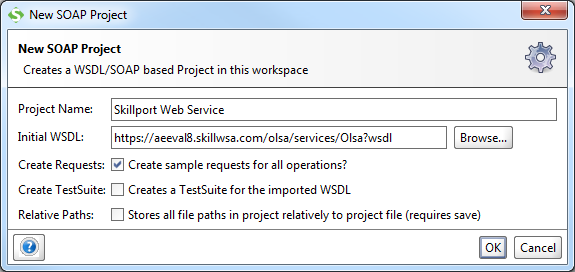
2. In the new window, you will be asked to provide the details of your project.
Give your project a name, and then enter the location of the wsdl file for your Skillport site. By default the olsa.wsdl file is located at the following location: http://xxxxxxx.skillwsa.com/olsa/services/Olsa?wsdl.
Click OK when you're done.
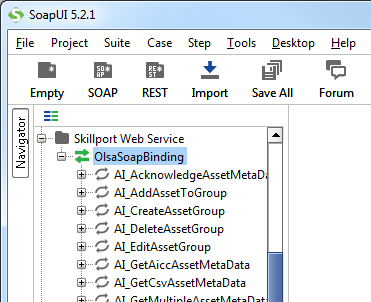
3. At this point soapUI will parse the supplied olsa.wsdl file for any available web services and will then build out some sample services for them. The project navigator window on the left will show a list of all of the services that were contained within the olsa.wsdl file.
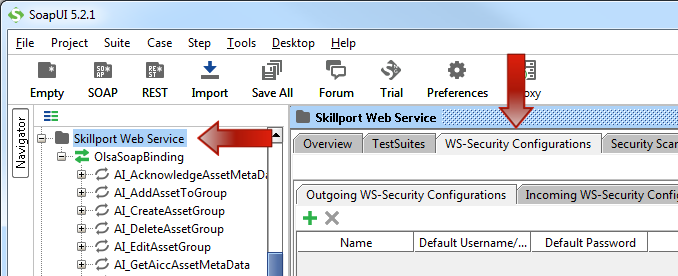
4. Double-click on your project name in the navigator window. A new window will open allowing us to configure the security options for the OLSA Username Token.
Click on the WS-Security Configurations tab, then select the Outgoing WS-Security Configurations tab.
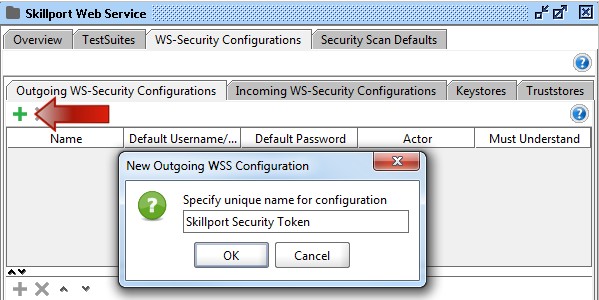
5. Click on the "+" under the Outgoing WS-Security Configurations tab. Provide a descriptive name like in the screenshot below and then click OK.
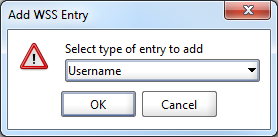
6. Place a checkmark in the Must Understand box, and then click on the "+" sign as indicated in the screenshot below.

Select Username from the drop-down menu and click OK.
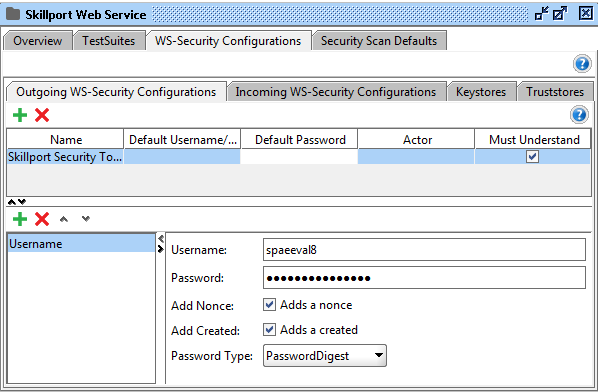
Enter the Username (CompanyID) and Password (Shared Secret) provided to you by your Skillsoft technical contact. In the Password Type field, select PasswordDigest from the dropdown menu.
You can now close the window by clicking the "X" symbol in the top righthand corner.
This completes the setup configuration portion of the walk-through.
Step 2 - Running your first web service example.
Now that we've properly configured soapUI, lets try and run one of the web service examples.
In this example, we're going to try and create a new user account on your Skillport site using the SO_GetMultiActionSignOnUrl web service.
1. Locate the SO_GetMultiActionSignOnUrl (Skillport 7.x) or SO_GetMultiActionSignOnUrlExtended (Skillport 8.x) web service in the list and expand the entry. Double-click on "Request 1" so a new window will open that contains the example service.
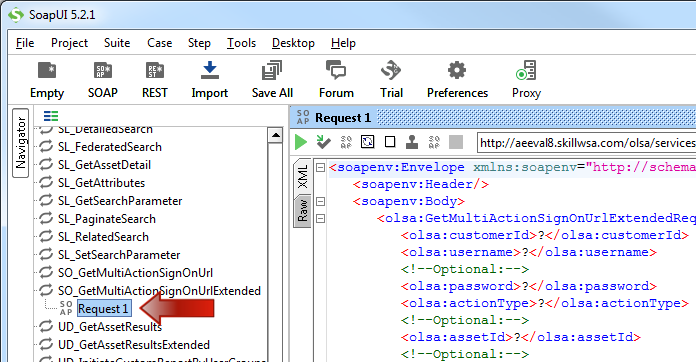
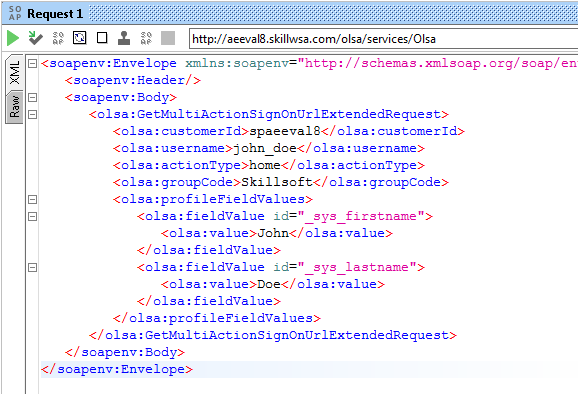
2. In the Request 1 window we're going to remove some of the optional data elements.
Remove all of the optional data elements, leaving the following:
- customerId - This is the CompanyID value used earlier.
- userName - This is an alphanumeric string identifying this specific student account.
- actionType - For the purpose of this example, please use the "home" value.
- groupCode - This is the group where the new student will be created within Skillport.
- firstName - This is the student's first name.
- lastName - This is the student's last name.
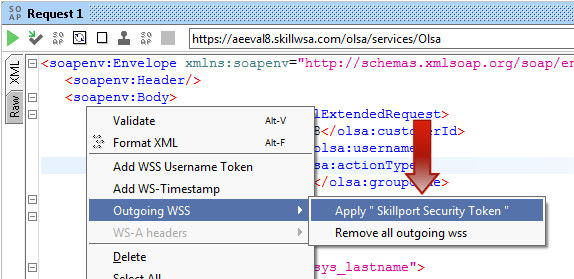
3. Right-click anywhere in the main request window to open a menu.
Select Outgoing WSS >> Apply "OLSA Username Token". This will add the security header information to the Soap envelope request.
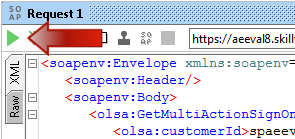
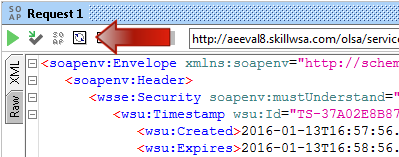
4. Right-click again anywhere in the main request window and select Add WS-Timestamp. The default value of 60sec is fine.

Click the green arrow in the top left-hand corner to submit the web service request.
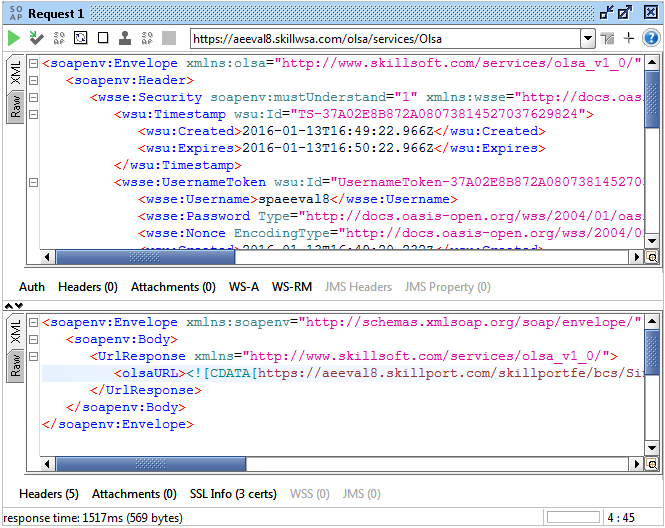
5. If all went well with the service request, you will get a response from your OLSA site that contains a login link for Skillport; for this specific student account.
Recycle your web service example!
Each time you want to submit a service request you will need to apply the username token and the timestamp. To reset the request, simply right-click in the main request window and select Outgoing WSS >> Remove all outgoing wss.

Alternatively, you can rebuild your request by clicking on the rebuild icon in the main request window.
Back to the top of this page.